|
|
|
|
|
|
UVLayout ist eine eigenständige Anwendung zum Erstellen und Bearbeiten von UV-Koordinaten für 3D-Polyobjekte und Subdivision Surfaces. UVLayout wird von Profis in den Bereichen Spieleentwicklung und Spezialeffekte ebenso verwendet wie von Hobbyanwendern und Studenten. Der einzigartige Zugang der Software bietet Texturkünstlern alle Möglichkeiten, um qualitativ hochwertige UVs mit geringer Verzerrung zu erzeugen, und das mit deutlich weniger Zeitaufwand als mit traditionellen Methoden.
Auf den folgenden Seiten wird das UVLayout-Menü beschrieben, wobei die Elemente des Fensters von oben nach unten beschrieben werden. Mit dem Menü links können Sie gezielt zu den verschiedenen Kapiteln springen. Wer sich gleich direkt in die Arbeit mit UVLayout stürzen möchte, sollte zumindest das Kapitel „Schnellstart“Quick Start durchlesen.
Hinweis: Abschnitte, die mit [Professional Version Only] markiert sind, beschreiben Funktionen, die nur in der Professional-Version von UVLayout zur Verfügung stehen. Klicken Sie auf den Link [Professional Version Only] um diese Abschnitte durchzublättern.
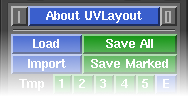
Die oberste Reihe des UVLayout-Hauptfensters (siehe Bild rechts) besteht aus drei Schaltflächen:
- Pin
- Klicken Sie auf die graue Schaltfläche links, um die aktuelle Fensterposition zu fixieren/speichern; UVLayout wird sich dann immer an dieser Stelle öffnen, bis eine neue Position festgelegt wird.
- About UVLayout
- Wenn Sie auf About UVLayout klicken, können Sie die Anwendungsversion und das Build-Datum nachlesen, nach Updates suchen, sich das Handbuch anzeigen lassen und einige Einstellungen ändern. Details siehe unten.
- Max
- Klicken Sie auf die graue Schaltfläche rechts, um die geöffneten Fenster zu maximieren; dabei wird das Hauptmenü links oben platziert und das Grafikfenster füllt den restlichen Bildschirm aus. Wenn Sie nochmals auf die Maximieren-Schaltfläche klicken, wird die vorherige Fensteranordnung wiederhergestellt.
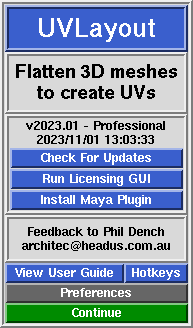
Wenn Sie auf About UVLayout klicken, öffnet sich ein Fenster (siehe Bild rechts), in dem Sie die Versionsnummer und das Build-Datum Ihrer aktuellen UVLayout-Version sehen können.
- Check For Updates [Professional Version Only]
- Klicken Sie auf diese Schaltfläche um nachzusehen, ob es eine neuere Version als Ihre derzeitige gibt. Es öffnet sich ein Fenster in Ihrem Standard-Webbrowser, und wenn es neuere Versionen gibt, werden die neuen Funktionen und Verbesserungen angezeigt.
- Try Professional Version
- Mit dieser Schaltfläche können Sie UVLayout als Professinal-Version im Demomodus starten, dabei sind alle Funktionen außer der Speicherung verfügbar. Damit haben Sie die Möglichkeit, alle Funktionen von UVLayout zu testen, wie sie in diesem Handbuch beschrieben und in den Training-Videos gezeigt werden.
- View User Guide
- Mit dieser Schaltfläche können Sie sich eine vereinfachte Version des Handbuches in Ihrem Standardbrowser anzeigen lassen. Dabei wird eine Datei geladen, die zusammen mit der Software installiert wurde, Sie benötigen dafür also keine Internetverbindung.
- Preferences
- Diese Schaltfläche öffnet das Menü Preferences (Voreinstellungen). Hier können Sie eine Reihe von Einstellungen verändern, die auch beim nächsten Start von UVLayout erhalten bleiben.
- Try CySlice Attach First
- Diese Einstellung betrifft nur Anwender, die UVLayout in Kombination mit CySlice Floating-Lizenzen verwenden. Wenn diese Option aktiviert ist, überprüft UVLayout, ob dieser Workstation bereits eine CySlice-Lizenz zugeordnet ist; wenn ja, dockt es an diese Lizenz an statt weiter nach einer freien UVLayout-Lizenz zu suchen.
- Map
- When using the T hotkey, UVLayout cycles between error feedback, a checker pattern, and a mapped on texture map. You can change what this texture map is by clicking on the right arrow and browsing to the file you want to use.
- Trace Max Rez
- When using the Display panel's Trace feature, the map you select is reduced to this size. If you have a modern graphics adapter with a large amount of texture memory, you can probably increase this value to get sharper looking background images.
- Mouse Buttons
- Sometimes UVLayout will get confused about the number of buttons your mouse has, particularly if you're on a laptop and are swapping between an external mouse in an inbuilt touch pad without completely rebooting. This may affect things like the Space-MMB or Ctrl-MMB actions to move shells and points around. You can use this setting to force UVLayout to treat the mouse as though it has the number of buttons you select.
- Double Tap
- This sets the double tap speed, in seconds, for hotkey actions like the edge straightening Double-S. If you find you can't tap fast enough, increase this value.
- Enable LMB Edit
- Turn this on to enable Ctrl-LMB edits of UV points, doing the exact same thing as Ctrl-MMB. Be warned though, in a future version we may want to use the Ctrl-LMB key combination for other things, and so this duplication of the edit action could be removed.
- Set All UVs on Save
- Normally only flattened polys will be saved with UVs. Enabling this preference will force UVLayout to assign a planar projection to any unflattened polys when the mesh is saved out to OBJ files.
- Undo Show
- By default, Ctrl-Z Undo is enabled; the code is quite new and not extensively tested, so if you experience problems with it, click on the Undo button to turn it off. When Undo is enabled, the name of the previous action is displayed towards the top right of the graphics window, along with a small bar that indicates how full the Undo buffer is; to hide this information, click on the Show button to turn it off. The Undo buffer starts off at 100Mb, which means that UVLayout will use up to this amount of RAM when saving the undo restore information; if you are on a system with limited RAM, you may want to reduce this number, and conversely, increasing it on a larger system will give you more levels of undo.
- Show Old GUI Controls
- To keep the GUI as clean as possible, buttons that may still do something are removed if they've been superseded by newer functions. If you preferred the old way of doing something, tick this option to show those old buttons.
- Max Shells
- When an OBJ file is loaded in Edit mode, the number of UV shells is checked first; if there's more than this setting, the load is aborted and a message is displayed suggesting that the Weld UVs load option might be needed. If your mesh really does have more than the default of 2000 shells (e.g. individual leaves on a tree) then you can increase the shell limit here.
- Optimized Picking
- With very heavy meshes, or some OS/GPU combinations, UVLayout's picking (e.g. for marking cut edges) was quite slow. This preference option, if enabled, turns on some new code that speeds up the picking process.
|

