User Guide: Render
From UVLayout Docs
|
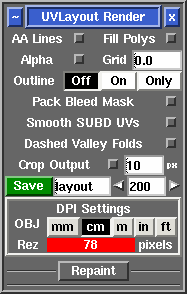
Open up the Render panel if you want to save out the current UV layout to a tiff image file. This file could then be used as a template for texture painting.
Once created, the image is displayed; you can then use File|Save or Ctrl-S to save it to a different location if you wish, using a ".tif" or ".jpg" filename extension to select the format of the saved image. RepaintThe Repaint tool allows you to load an old mesh and texture map into UVLayout where you can then modify the UVs (e.g. repack, optimize, modify seams) and then repaint the old map according to the new UVs. To use, the modified mesh with new UVs should be loaded into the 3D window. Click on the "Mesh" arrow to select the file (OBJ or UVL) with the original UVs. Click the "Map" arrow to select the original color map. Tick the "Snap Shells" box if you want to move the current shells so they're locked to the pixel locations; this is needed for lossless copying of shells that have been translated or rotated by 90 degree steps only. Click the "Repaint Map" button and the new map should be displayed when complete. If you ticked "Snap Shells" you'll probably want to save out the loaded mesh because it will have been modified. If the map being repainted is a texture space normal map, you can tick "Renormalize" and the normals will be adjusted for shells that have been rotated. The "nV" option selects nVIDIA style normal maps, and use "ATI" for maps with an inverted G channel. Its safe to leave "Renormalize" on for standard color maps because UVLayout will only adjust the color values if it detects that a normal map has been selected. At the moment it only works for single tiles ... that is, all UVs in the original and current meshes have to be contained within the 0 to 1 UV space. |
