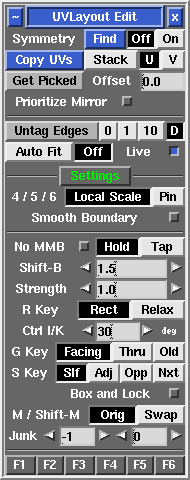
User Guide: Edit
From UVLayout Docs
(Difference between revisions)
| Revision as of 10:12, 25 May 2011 (edit) Headus (Talk | contribs) ← Previous diff |
Revision as of 10:15, 25 May 2011 (edit) (undo) Headus (Talk | contribs) Next diff → |
||
| Line 5: | Line 5: | ||
| : If parts of your mesh are symmetrical but detached (e.g. a pair of shoes), first LMB click on any edge in one shell, then MMB click on the mirrored edge in the other shell, then tap the space bar to continue. | : If parts of your mesh are symmetrical but detached (e.g. a pair of shoes), first LMB click on any edge in one shell, then MMB click on the mirrored edge in the other shell, then tap the space bar to continue. | ||
| - | ; Copy UVs Stack/U/V {{Pro2|pro4|User_Guide:_Edit_Options#pro5}} : To copy UVs between parts of your mesh, first click the '''Copy UVs''' button, then LMB select an edge in the source shell (i.e. the shell you want to copy UVs from); you can select this edge in either the UV or 3D views. This "source" edge will be highlighted in red. | + | ; Copy UVs Stack/U/V {{Pro2|pro4|User_Guide:_Optimize#pro6}} : To copy UVs between parts of your mesh, first click the '''Copy UVs''' button, then LMB select an edge in the source shell (i.e. the shell you want to copy UVs from); you can select this edge in either the UV or 3D views. This "source" edge will be highlighted in red. |
| : Next LMB select edges, in the same relative position, for the target shells; by selecting multiple edges, you can copy to more than one shell at a time. If you accidentally select the wrong edge, LMB click on it again to unselect it. All "target" edges are highlighted in blue. | : Next LMB select edges, in the same relative position, for the target shells; by selecting multiple edges, you can copy to more than one shell at a time. If you accidentally select the wrong edge, LMB click on it again to unselect it. All "target" edges are highlighted in blue. | ||
| Line 20: | Line 20: | ||
| ; Auto Fit/Off : When '''Auto Fit''' is on, all current UVs are re-normalized (scaled to fit in the 0 to 1 range) every time a UV shell is moved or modified. When '''Off''', they aren't, so you can move shells beyond this range and out onto other tiles. Use the + and _ keys to scale the UV unit box up and down. | ; Auto Fit/Off : When '''Auto Fit''' is on, all current UVs are re-normalized (scaled to fit in the 0 to 1 range) every time a UV shell is moved or modified. When '''Off''', they aren't, so you can move shells beyond this range and out onto other tiles. Use the + and _ keys to scale the UV unit box up and down. | ||
| - | |||
| - | ; O/C/N {{Pro2|pro5|User_Guide:_Optimize#pro6}} : When '''O''' is selected the original (pre-v1.9) flattening algorithm is used for all flattening calculations. When '''C''' is selected, a more recent method is used. When '''N''' is selected, the newest method is used; it handles long thin polys better. The older methods are made available in case the newer methods fail for some reason. | ||
| ---- | ---- | ||
Revision as of 10:15, 25 May 2011
|
Open up the Edit panel to find a number of general editing tools and settings.
|
