User Guide: About UVLayout
From UVLayout Docs
| Revision as of 09:19, 16 October 2007 (edit) Headus (Talk | contribs) ← Previous diff |
Revision as of 09:54, 25 February 2008 (edit) (undo) Headus (Talk | contribs) Next diff → |
||
| Line 36: | Line 36: | ||
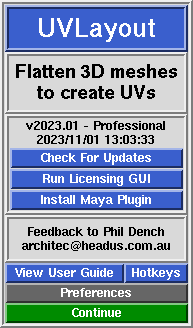
| ; Try Professional Version : Clicking this button will restart UVLayout in Professional version trial mode, with everything but the Save buttons enabled. This gives you the opportunity to test out all the features of UVLayout described in this User Guide and as shown in the training videos. | ; Try Professional Version : Clicking this button will restart UVLayout in Professional version trial mode, with everything but the Save buttons enabled. This gives you the opportunity to test out all the features of UVLayout described in this User Guide and as shown in the training videos. | ||
| + | |||
| + | ; Try Hobbyist Version : Clicking this button will restart UVLayout in Hobbyist version trial mode. This gives you the opportunity to try out the features provided in that version of UVLayout. | ||
| ; View User Guide : Click this button to view a simplified version of the User Guide in your default browser. Its loading a file included in the software installation, so you don't need to be connected to the internet to view it. | ; View User Guide : Click this button to view a simplified version of the User Guide in your default browser. Its loading a file included in the software installation, so you don't need to be connected to the internet to view it. | ||
| Line 62: | Line 64: | ||
| :; Optimized Picking : With very heavy meshes, or some OS/GPU combinations, UVLayout's picking (e.g. for marking cut edges) was quite slow. This preference option, if enabled, turns on some new code that speeds up the picking process. | :; Optimized Picking : With very heavy meshes, or some OS/GPU combinations, UVLayout's picking (e.g. for marking cut edges) was quite slow. This preference option, if enabled, turns on some new code that speeds up the picking process. | ||
| + | |||
| + | :; Open Cuts in UV View : blah blah | ||
| + | |||
| + | :; Restore GUI Panels : blah blah | ||
Revision as of 09:54, 25 February 2008
|
UVLayout is a stand-alone application for the creation and editing of UV coordinates for 3D polymeshes and subdivision surfaces. Used by professionals in the games and visual effects industries, by hobbyists of all ilks and by students, UVLayout's unique approach gives texture artists the tools they need to produce high quality low distortion UVs in significantly less time than they would by traditional methods.
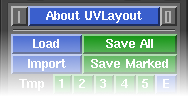
Over the following pages the UVLayout GUI will be described, working from the top to the bottom of the main window. Use the menu to the left to move through the various chapters. If you want to jump right into using UVLayout, you should at least read the Quick Start chapter. Note: Sections tagged with a [Professional Version Only] label describe features only available in the Professional version of UVLayout. Click on the [Professional Version Only] link to cycle through these sections. Note: Sections highlighted in green have been added or changed recently. Click on the following links to cycle through the changes made to the User Guide with each version. The top row of the UVLayout main window (see image right) consists of three buttons:
When you click on the About UVLayout button a window (see image right) pops up, showing the version and build date of the UVLayout that you are currently running.
|

